Tutorials
- Introduction
- Using the Interface
- Accessing a Server
- Exploring the API
- Using Endpoints
- Getting an Access Token
- Understanding Resources
- Building Requests
- Handling Responses
- Posting Data
- Mapping Fields
- Using Codes
- Using Value Sets
- Getting Provider Details
- Handling Errors
- Next Steps
Use Cases
Interface
Examples & Testing
Endpoints
Getting an Access Token
The FHIR Interface protects health data (PHI) by requiring authentication on all operations. With the exception of the capability information, every request must contain an access token for authorization. To get an access token, FHIR uses SMART® Authorization (also known as “SMART on FHIR”), an authentication scheme built on the OAuth2 standard.
This guide assumes you have a working knowledge of OAuth2 terms and workflows, and will only discuss how those workflows relate to using CareEvolution’s FHIR API. If you are new to OAuth, there is more information available on the HL7 Website.
Contents
Types of Clients
The FHIR standard defines two types of clients: SMART clients and backend clients.
Applications are referred to as “clients” in SMART Authorization, so you may see these terms used interchangeably.
SMART clients use the SMART App Launch Framework, and can be launched from within the CareEvolution web application or standalone, such as a mobile app. These apps will use the credentials of the user (typically a patient or clinician) who’s using them.
Backend clients typically run autonomously, without any direct user input. They may be doing bulk data exports or analytics. They have special security considerations, as described in FHIR’s Backend Services Authorization Guide. They are associated with a system user rather than a patient or clinician.
SMART Client Registration
HIEBus will only issue access tokens to registered applications, so you must register your SMART client with the system.
Registering Your App on the Public Test Server
On the CareEvolution public test server, you can register your own apps by selecting “Register SMART Clients” on your account home screen.
Enter your app’s name, the OAuth redirect URI(s), and an optional client secret. If you wish to use the more secure Proof Key for Code Exchange (PKCE) authentication model, check the PKCE box.
Using PKCE is recommended to guard against your authorization token being hijacked by a malicious application on the same device.
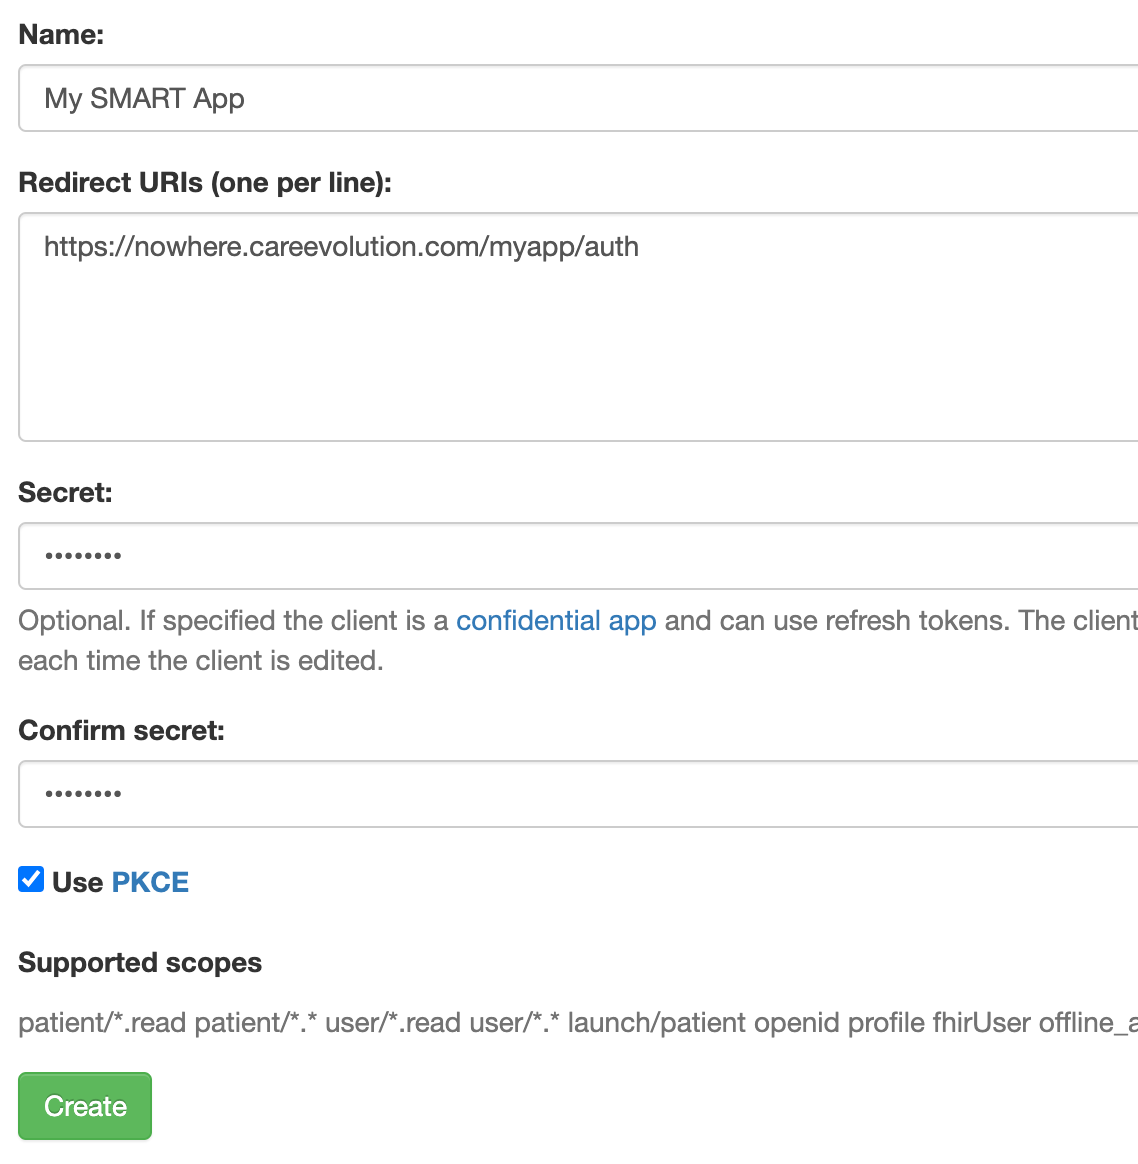
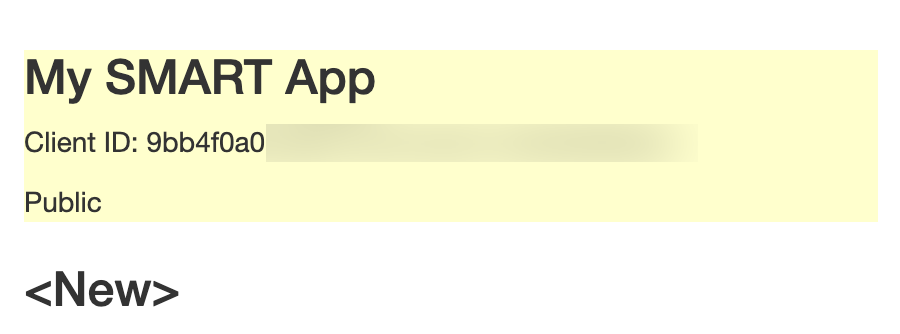
Once you’ve registered an app, the system will assign it a client ID. This is the identifier you will use in your OAuth requests to get access tokens. You can find your client ID on the “Register SMART Clients” screen.
You may register an additional app by clicking “New” and entering the app’s details. To edit or delete an existing app.
- Select the app from the list in the sidebar.
- Edit its information as needed.
- Select “Update” to save or “Delete” to delete.
Registering Your App on a Production Server
For productions servers, you will need to contact the local site administrator to have your app registered. They will provide you with your client ID.
OAuth Endpoints
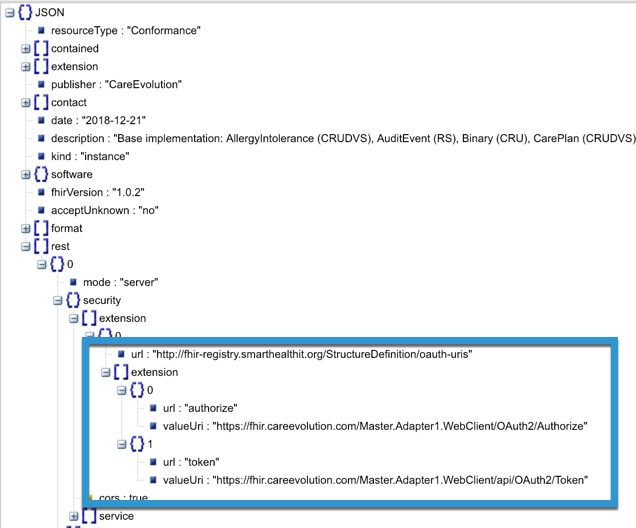
The OAuth endpoint information is included in the capability statement. It is recommended that you look up the OAuth endpoints programmatically rather than coding them directly into your application, in case they ever change.
SMART apps must use the OAuth2 Authorization Code Flow.
User Permissions
An access token is associated with a specific user, and only grants permission to resources that the user would have access to in the HIEBus web client. For example, a patient user would typically only see their own patient data. A clinician user would generally see only the patients they were responsible for.
All self-registered accounts on the public test server have clinician permissions, giving you access to a set of test patient data.
If you need to access things from a patient’s perspective, you can use one of the public patient accounts for your testing. From your account home screen, select “Test Patient Accounts” to view their usernames and passwords.
Scopes
When you request an access token, you need to specify which OAuth scopes you want that token to have. A token can never access more than the associated user would be able to, but scopes can be used to limit what the token allows.
Permission Scopes
Permission scopes control what access the resulting token will have.
| Scope | Description | Notes |
|---|---|---|
patient/*.read |
Read-only access to the current patient’s records. | Applies to the patient associated with the user account. |
patient/*.* |
Read-write access to the current patient’s records. | Applies to the patient associated with the user account. |
user/*.read |
Read-only access any resources the current user has access to. | |
user/*.* |
Read-write access to any resources the current user has access to. | |
system/*.read |
Read-only access to system records for multiple patients/users. | Only available through backend services authorization. |
system/*.* |
Read-write access to user records. | Only available through backend services authorization. |
Other Scopes
Other scopes request additional information in the token response, or other special behavior.
| Scope | Description | Notes |
|---|---|---|
launch/patient |
When launching outside the EMR, prompt for which patient to select. | |
openid fhirUser |
Permission to retrieve information about the current user. | See the HL7 site for details. |
Backend Services Authorization
If you wish to use backend services authorization for your app, the site administrator will need to set up a system account and associated client.
For the public test server, there is already a client/account set up for your use. To obtain an access token using this method:
- Select “Use Backend Services Authentication” from your account home screen to find the client details.
- Create a JSON Web Token (JWT) assertion using the “client ID”, “issuer”, and desired scopes.
- Sign the JWT assertion using the “private key.”
- Submit the JWT to the “token end point” to obtain an access token.
For more information, including detailed sequence charts, see the FHIR backend services authorization guide.
Generating Test Tokens
You can generate a access token for test purposes by using the “Get Access Tokens” option on your account home screen. Simply specify the desired scopes and click “Request Token.” The system will then display a temporary access token associated with your user account.
Have questions about the HIEBus FHIR interface? Contact us at fhir@careevolution.com.
© 2023 CareEvolution, LLC